
(* Fashion Aids are available for purchase at your local SINGER SEWING CENTRE)
(Part No. 86718)
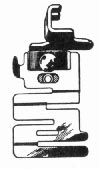
This attachment produces neat and durable buttonholes in a great variety of fabrics without any special skill on the part of the operator. The buttonholes are produced in a fraction of the time required for hand work and they are frimer and more even than those made by hand.
The attachment can be adjusted to make buttonholes from 3/8 to one inch long and the spacing of stitches, width of stitch and amount of cutting space can also be changed at will. When desired, buttonholes longer than one inch can also be made by following the instructions supplied with the attachment.
 THE
EDGE STITCHER
THE
EDGE STITCHER(Part No. 36865)
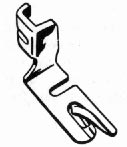
This attachment provides a series of slotted guides which regulate the placement of stitching in relation to a fabric edge.
Among its many decorative and practical applications are the joining and insertion of lace, tucking from pin width to 1/4 inch, French seaming, seam piping, facing and seam finishing.
 THE
GATHERING FOOT
THE
GATHERING FOOT(Part No. 121441)
Single or multiple rows of shirring can be quickly and expertly placed with the gathering foot. Evenly spaced shirring is insured as this foot is designed to lock fullnes into every stitch.
 Use
the Gathering Foot for --
Use
the Gathering Foot for --
Plain Shirring
Elastic Shirring
Waffle Shirring
Machine Smocking
 THE
HEMMER FOOT
THE
HEMMER FOOT(Part No. 120842)
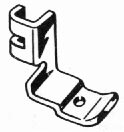
The Hemmer Foot forms a perfectly turned hem without basting or pressing.
It can be used for --
Fine Hems, Ruffle Edges, Hemmed Seams, Lingerie Finishes
 THE
QUILTER
THE
QUILTER(Part No. 35932)
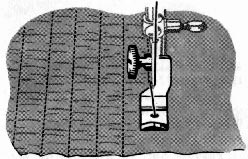
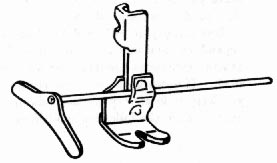
The Quilter is excellent for the placement of stitching in block, floral or scroll designs and is especially well adapted to stitching lightly padded materials. The short open foot permits following curved lines with ease and accuracy; the adjustable space guide placed to the right or left of the needle keeps rows of stitching parallel.
Your Featherweight is a fine yet sturdy precision instrument, and it will serve you perfectly for many years if you take a few simple steps to keep it in good working condition.
How often you will need to clean, oil, and lubricate your machine
will depend on how often you use it and where you keep it. The following general
guidelines assume that you will be sewing two or three times a week. If you
use the machine continuously, clean and oil it daily. Or, if you keep it in
a very warm or damp place, oil and lubricate it more frequently than the following
guidelines suggest.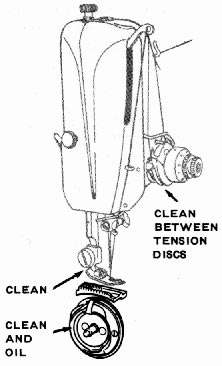
Remove lint and fluff from working parts. As a matter of fact, you will be able to see the lint and fluff on these parts, and we recommend that you remove them as they accumulate.
With a soft cloth, clean:
With a soft brush, clean:
![]()
Make certain, when replacing throat plate that position finger of bobbin-case base enters notch of position plate attached to underside of throat plate, as shown below.
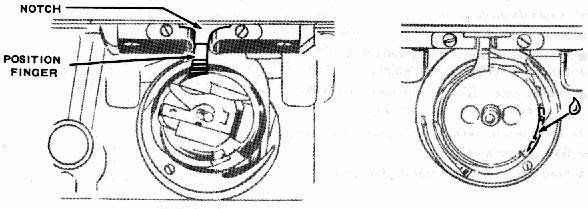
After cleaning the bobbin-case area, apply a drop of SINGER oil, as shown.
 EVERY
FEW MONTHS --
EVERY
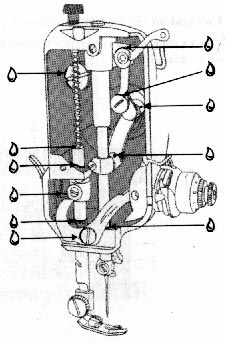
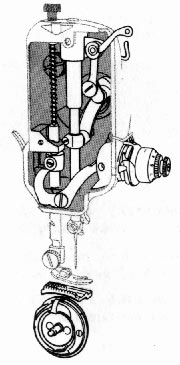
FEW MONTHS --1. Clean and oil the parts behind the face plate.
2. Clean and oil the top and back of the machine.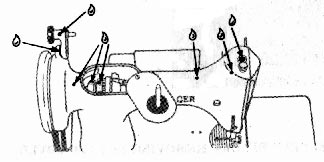
Clean and oil the underside of the machine.
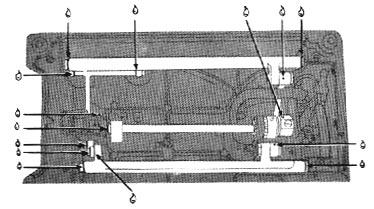
DISCONNECT PLUG FROM ELECTRICITY SUPPLY BEFORE REMOVING BOTTOM COVER
 IF
THE MACHINE IS TO BE STORED --
IF
THE MACHINE IS TO BE STORED --
The light is turned "on" or "off" by the switch located on bed of machine at the right.
DISCONNECT PLUG FROM ELECTRICITY SUPPLY BEFORE CHANGING BULB
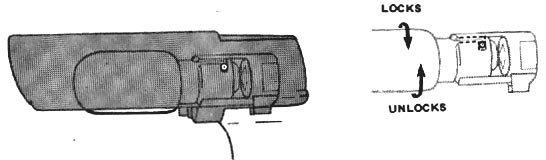
 To
Remove Bulb. Press bulb into socket and turn it in "unlock"
direction, as shown, and withdraw.
To
Remove Bulb. Press bulb into socket and turn it in "unlock"
direction, as shown, and withdraw.
To Replace Bulb. Press bulb into socket with bulb pin slot and turn it in "lock" direction, as shown.
 ADJUSTING
BELT TENSION --
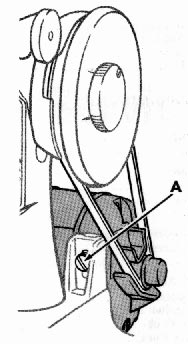
ADJUSTING
BELT TENSION --On rare occasions, you may find it necessary to adjust the tension on the motor belt. Tension on the belt should be just strong enough to keep the belt from slipping. If the belt is too tight, the machine will run slowly.
This will overload and possibly damage motor.
To Adjust --
1. Loosen bracket screw (A) a full turn.
2. Allow weight of motor to supply correct belt tension.
3. Tighten bracket screw.